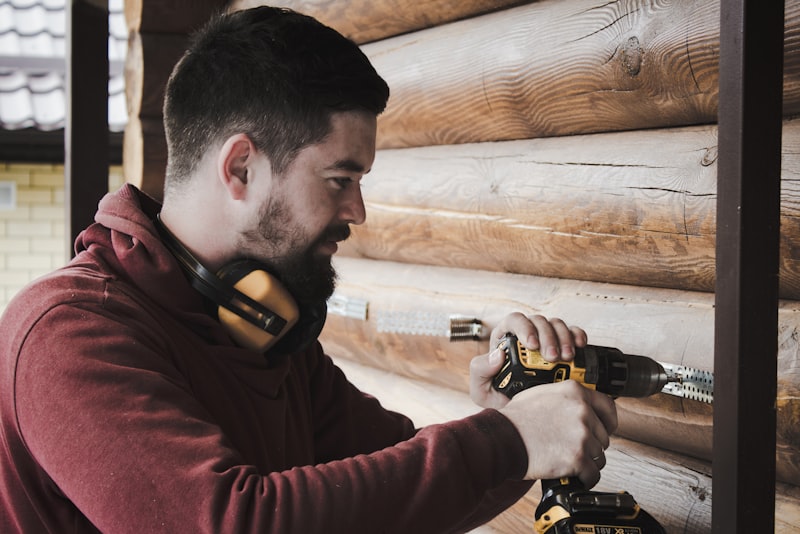
A cordless drill is usually the first power tool people buy, and for good reason. It drives screws, bores holes, and turns a dreaded afternoon of hand-cramping work into a few quiet minutes. It's also forgiving enough for a complete beginner, as long as you respect what that spinning bit can do to wood, walls, and fingers.
Most drill mishaps aren't dramatic. They're a slipped bit that gouges a knuckle, a workpiece that spins loose, or a snagged sleeve that pulls a hand toward the chuck. Every one of those is avoidable with a little setup and a few steady habits. Here's how to use a cordless drill with confidence and keep all ten fingers doing what you want.
Learn the parts before you pull the trigger#
Spend two minutes getting familiar with the tool and it stops feeling like a mystery. The chuck is the jaw at the front that grips the bit; most modern drills are keyless, so you tighten and loosen it by hand. Behind the chuck sits the clutch collar, the ring marked with numbers and usually a little drill symbol. Those numbers set how much twisting force the drill delivers before it slips, which is what saves your screws from being buried too deep.
There's a speed selector on top, often marked 1 and 2: low speed with high power for driving screws, high speed with less grunt for drilling holes. The trigger is variable, so a gentle squeeze means a slow start and a full squeeze means full speed. And there's a forward/reverse switch just above the trigger. Forward drives in and drills; reverse backs a stuck bit or screw out. Knowing these before you start means you're making choices, not guessing.
Set up before the bit touches anything#
A moving workpiece is where a lot of small injuries begin. Clamp your material to a bench or a stable surface so it can't spin or slide when the bit catches. If you're drilling into a wall, take a moment to think about what's behind it: hidden wiring and water pipes tend to run vertically from sockets and switches, so avoid drilling directly above or below them, and use a cheap detector if you have one.
Then dress for the job. Safety glasses are non-negotiable because drilling flings chips and dust straight up toward your face. Tie back long hair, push up loose sleeves, and take off dangling jewellery. If you want the full rundown on protective kit, our guide to choosing the right safety gear walks through what's worth owning.
Counterintuitively, bulky gloves can be more dangerous than bare hands near a rotating chuck, because loose fabric can catch and drag your hand in. Snug-fitting gloves or none at all, always paired with safety glasses, is the safer choice for drilling.
Load the bit and check it holds#
Open the chuck by twisting it counter-clockwise, seat the bit as deep as it will comfortably go, then tighten firmly by hand. Give it a gentle tug to confirm it's gripped. A bit that's only half-seated wobbles, drills a sloppy hole, and can work loose mid-job. Always slip the drill into reverse or remove the battery before you change a bit, so a stray finger on the trigger can't spin it while your hand is near the jaws.
Matching the bit to the material matters just as much as gripping it. A wood bit tears through masonry poorly and overheats; a masonry bit makes a rough mess of metal. If you're unsure which is which, our guide on choosing the right drill bits sorts them out.
Drill a clean, straight hole#
Good technique is mostly patience. Let the bit do the cutting rather than leaning your whole weight on it, because forcing it just generates heat, dulls the edge, and risks a sudden skid. Keep the drill square to the surface so the hole runs true, and ease off as you feel the bit about to break through the far side, where drills love to snatch and splinter.
- Mark your hole, and on smooth or slick surfaces tap a small dent with a nail so the bit can't wander.
- Start at low speed to let the tip bite, then increase once it's seated.
- Hold the drill perpendicular and apply steady, moderate pressure.
- Back the pressure off as the bit nears the far side of the material.
- Withdraw the bit while it's still spinning to clear the hole and leave clean edges.
For deep holes, pull the bit out every few seconds to clear the debris and let it cool. This is especially true in metal, where a hot bit dulls fast and can grab.
Drive screws without stripping them#
Driving screws is where the clutch earns its keep. Start with a low number, drive a test screw, and step up until the screw seats flush without the clutch slipping too early or sinking the head too deep. Use low gear for more torque, keep the driver bit pressed firmly into the screw head so it doesn't cam out and chew the slot, and run the drill slowly for the last turn.
Near the edge of a board, drill a small pilot hole first. Screws act like little wedges, and driving one straight into the end grain of wood is a reliable way to split it. A pilot hole barely takes a moment and saves the piece.
Lithium batteries last longest when they're treated gently. Store them somewhere cool and dry, roughly half to fully charged rather than bone empty, and avoid leaving a pack out in a freezing shed or a baking car. Keep the drill's air vents clear of dust so the motor can breathe, wipe the tool down after dusty jobs, and store bits somewhere they won't rattle around and chip their tips.
If a battery ever feels unusually hot, looks swollen, or the tool starts cutting out, stop and let it rest. Pushing a struggling drill is how motors burn out.
Reading the signs and knowing when to stop#
The drill will tell you when something's wrong if you listen. A bit that suddenly binds, a whiff of hot plastic, wisps of smoke, or a screw that won't go another millimetre are all signals to release the trigger immediately. Reverse the bit out, work out what changed, and start again rather than muscling through. Nine times out of ten it's a dull bit, the wrong speed, or a knot in the wood, and none of those get better with more force.
Treat the tool as capable but not casual, and a cordless drill becomes the friendliest thing in your kit. Clamp your work, protect your eyes, match the bit, and let the motor do the labour. Do that on your first project and it becomes second nature by your third, which is exactly when a good habit is worth having.